Docker Networking Demystified Part 3: Multi-Host Overlay Networks.
- Part 1: Introduction to Container Networking
- Part 2: Single Host Bridge Networks
- Part 3: Multi-Host Overlay Networks
- Part 4: Service Discovery and Ingress
Single-Host Bridge Networks are not really useful in a distributed application architecture. The task of managing multiple Bridge networks and ensuring containers are connected to them in such a way that they can speak to each other can be a very tedious task.
However, Docker did not leave us hanging high and dry.
Multi-Host Overlays
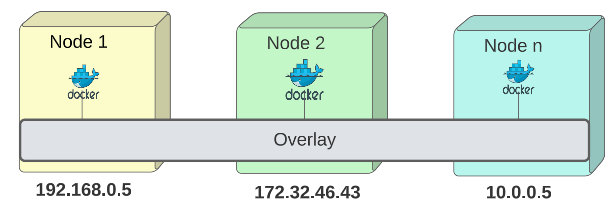
An Overlay is a special topology that connects multiple container running nodes to each other, thereby making their containers accessible to one another. The nodes can be on different machines, in different data centres or different EC2/VMs - it doesn't matter. If they are on an Overlay network, they can talk to each other.
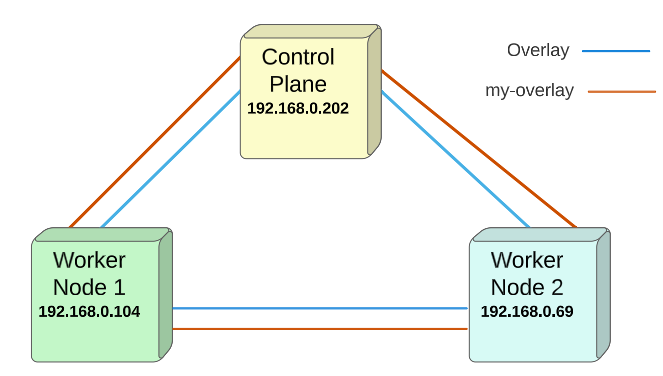
Visually, an Overlay topology looks as follows:
Demo: Set up an Overlay Network
For this demo, I will use 3 AWS EC2 instances with Docker installed on them:

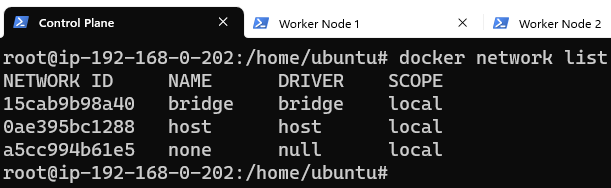
On the Control Plane, type the command to list default networks that come as part of the Docker binary installation.
Before setting up Overlay networks, we must activate Docker's swarm mode.
To activate the Swarm Mode, use the command shown in the image below:

In case there are multiple IPs, use the Private IP of the node for this flag.
The Swarm initialized and generated a docker swarm join command which should be run on the other nodes, to make them a part of this Swarm.


We can confirm the nodes are now part of the Swarm by going back to the Control Panel and listing the nodes just added:

Visually, we can hypothesize the Swarm nodes are laid out as shown:

Activating the Swarm automatically creates an Overlay Network.
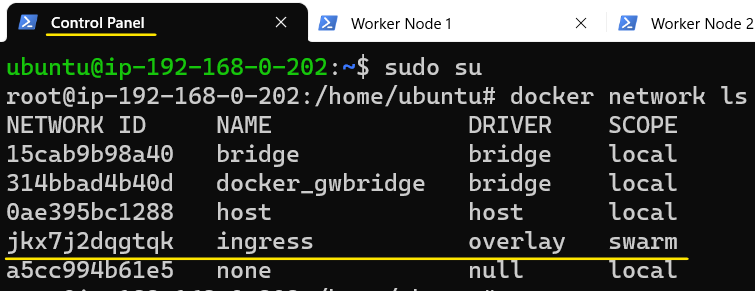
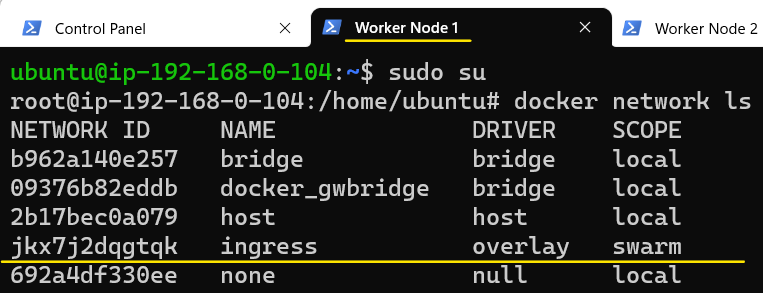
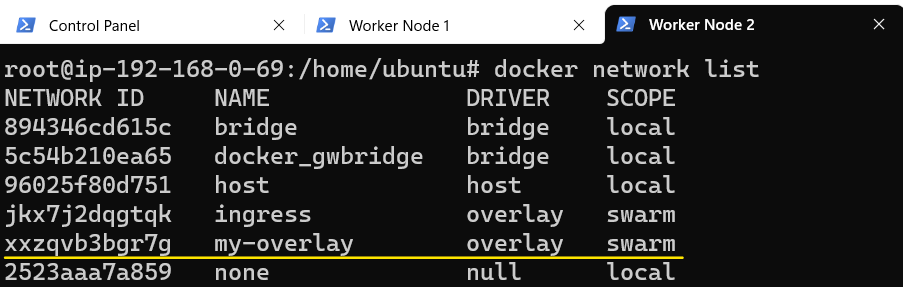
To confirm this indeed is true, we will list the network interfaces being managed by Docker:
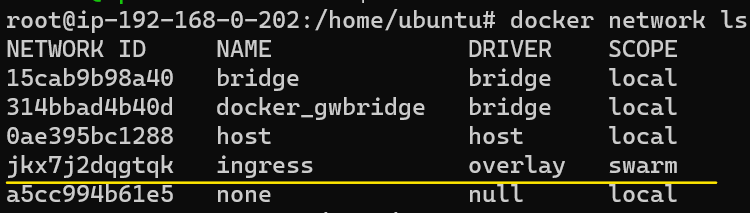
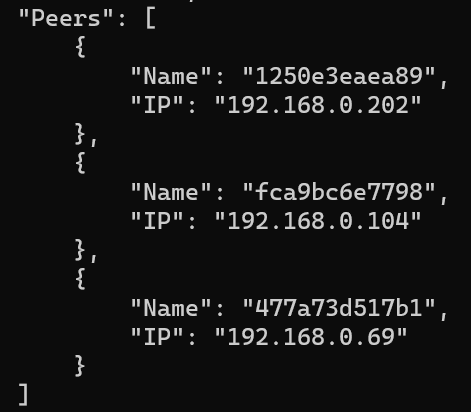
We can confirm that the Overlay is connecting all the nodes in the Swarm:
Let's inspect the Overlay network.
There are many attributes in an Overlay network. Let's look at a few basic ones:
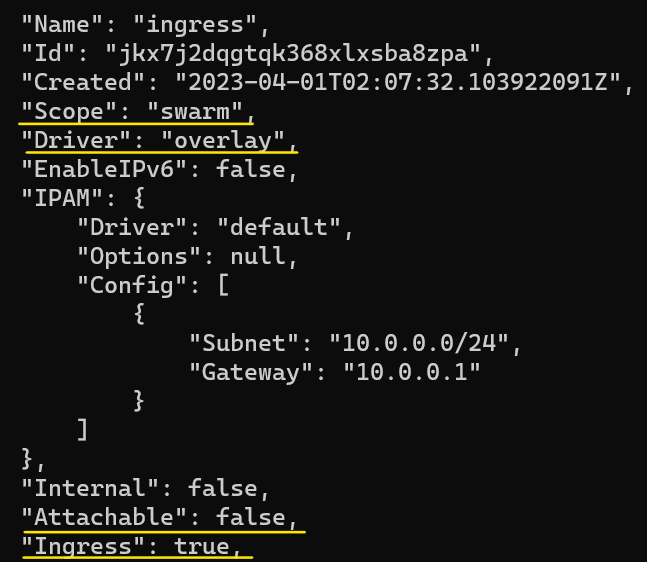
We should try to stay away from adding user apps to the ingress network.
Whoa ! What ?
The ingress gateway is used by Docker to route incoming traffic to an eventual destination. It makes sense to let that be the sole purpose it fulfills. For other use cases where an Overlay may be necessary, we can (and should) create our own (as shown below):
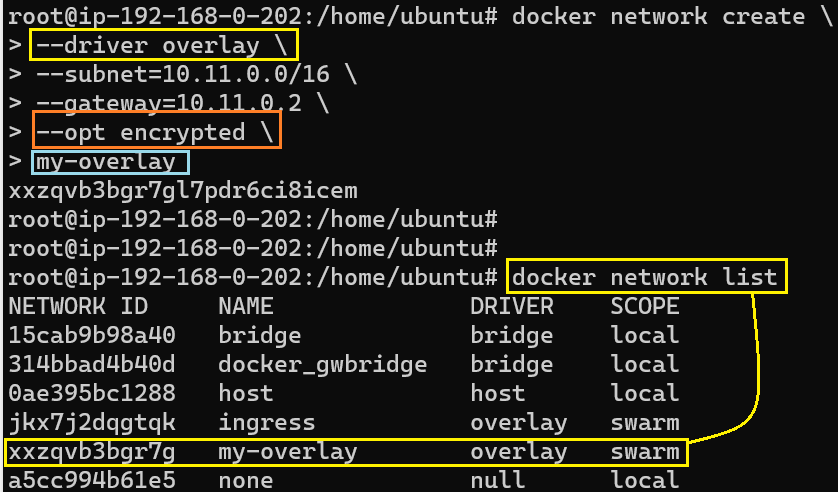
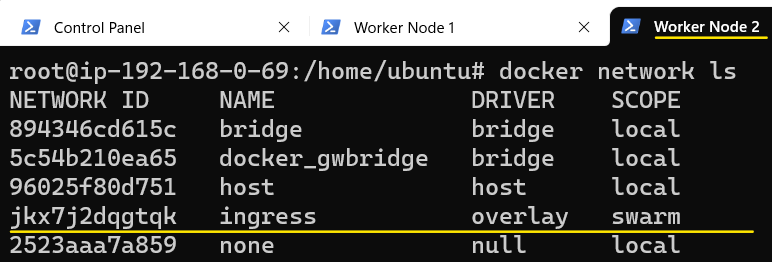
Since we created this network on the Control Plane node, the Control Plane node automatically gets attached to it and since this is an Overlay and has Swarm scope, it should also be listed on Worker Node 1 and Worker Node 2.
To confirm that this is actually true, lets display the list of available network interfaces on Worker Node 1:
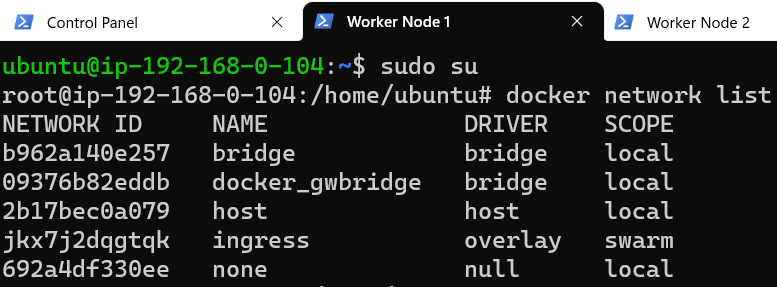
Lo and behold ! There is NO mention of my-overlay on Worker Node 1. Does this mean that Worker Node 1 (and Worker Node 2) did not get attached to my-overlay even though they are part of the Swarm?
User-created Overlays 'lazy-load' nodes in a Swarm.
Overlays can end up having many nodes attached to them over a part of time. In order to minimize the operational overhead, user-created Overlays will ONLY get 'activated' on Swarm nodes IF there is a reason for them to, for example, if a container/service is launched on them.
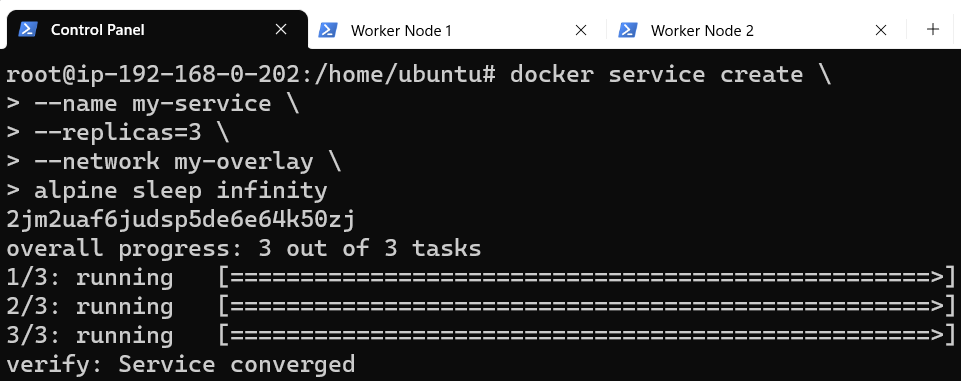
To demo this fact, let's launch a set of services on our Swarm:

Visually, the layout now resembles something like below:
Docker, by default, follows a round-robin strategy and deploys one instance of the replicas on each of the nodes. For all intents, having a service deployed on a node is reason enough for them to join my-overlay (since there may be a need for each of these replicase to communicate with each other or even the outside world).
We can confirm that the above statement is indeed true by listing network interfaces on Worker Node 1 and Worker Noder 2:

Finally, let's confirm that the three nodes are able to communicate with each other.
For the final confirmation, we will attempt to access the Worker Node 2 through the Control Panel node followed by accessing Worker Node 1 through Worker Node 2.
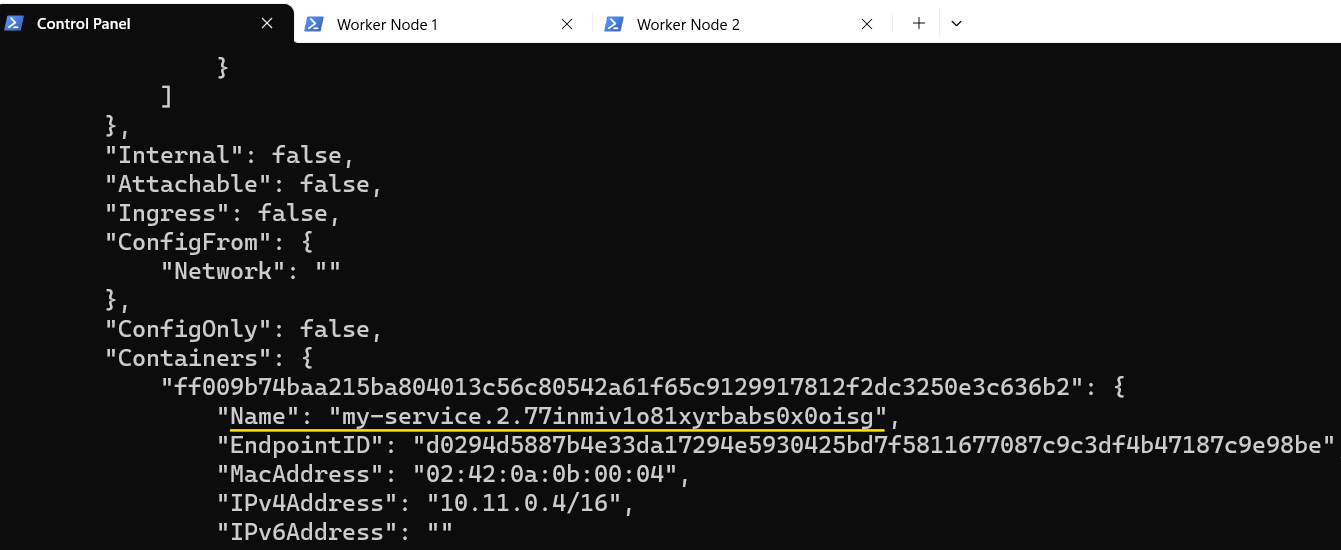
For Control Panel to Worker Node 2:
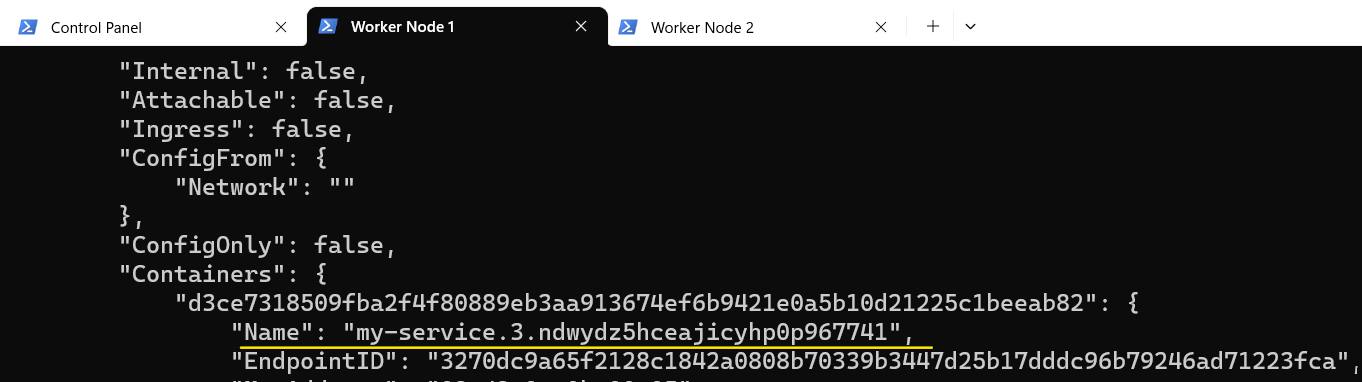
- Find out the name for Control Panel and Worker Node 2:
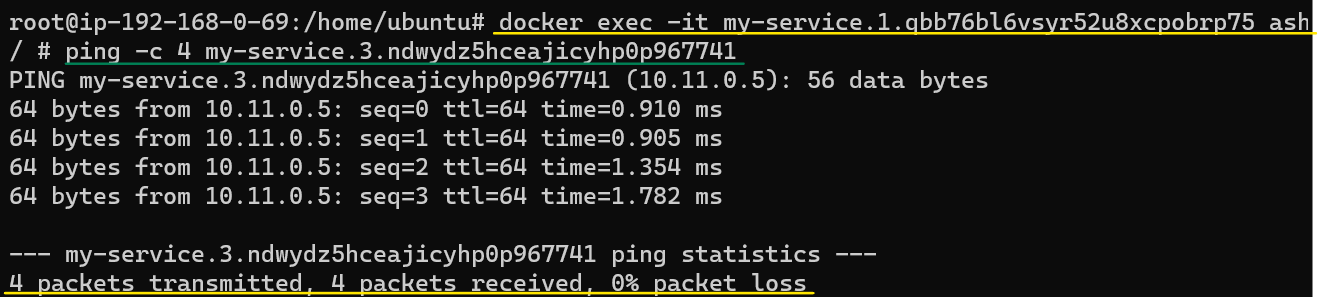
2. Attach to Control Panel using the exec command:

3. Ping Worker Node 2 by using the name that is used for it:
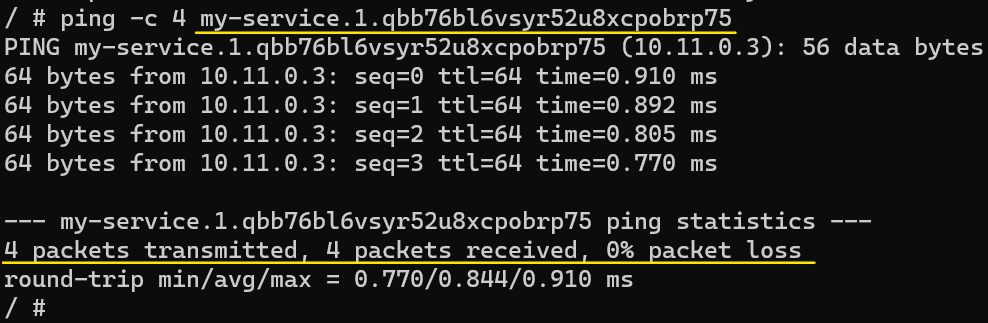
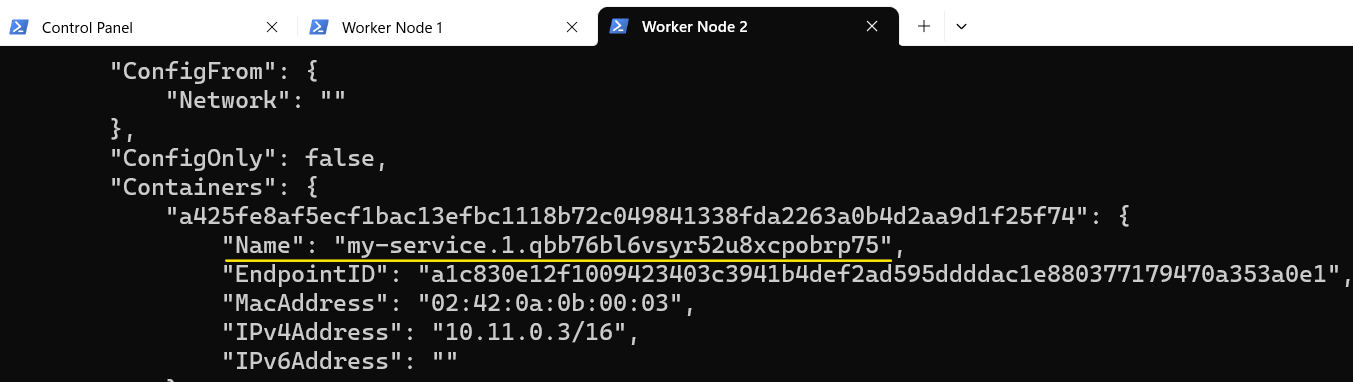
Repeat the same exercise again but this time try to access Worker Node 1 through Worker Node 2:
Attach to Worker Node 2 using the docker exec command:
- Overlays.
- Swarms and how they automatically create Overlays for us.
- Swarm created Overlay and its dedicated role of being an ingress operator.
- User-defined Overlay interfaces and how to make them useful for distributed architectures.
- Adding stand alone containers to Overlays.
I write to remember and if in the process, I can help someone learn about Containers, Orchestration (Docker Compose, Kubernetes), GitOps, DevSecOps, VR/AR, Architecture, and Data Management, that is just icing on the cake.