The Lifecycle of a Terraform Resource.
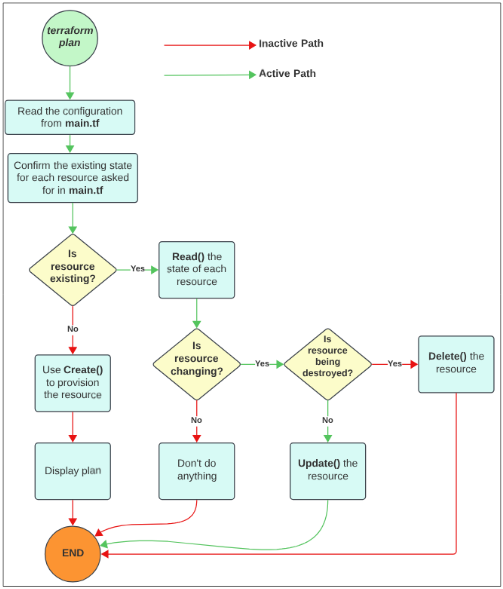
Behind the show and bluster of being likely the most well known IaC tool in the world right now, Terraform is remarkably simple. For lack of a better description, its a state machine (i.e. it takes a resource through all the stages of a typical Create Read Update Delete or CRUD).
Table of Contents
Lifecycle Function Hooks
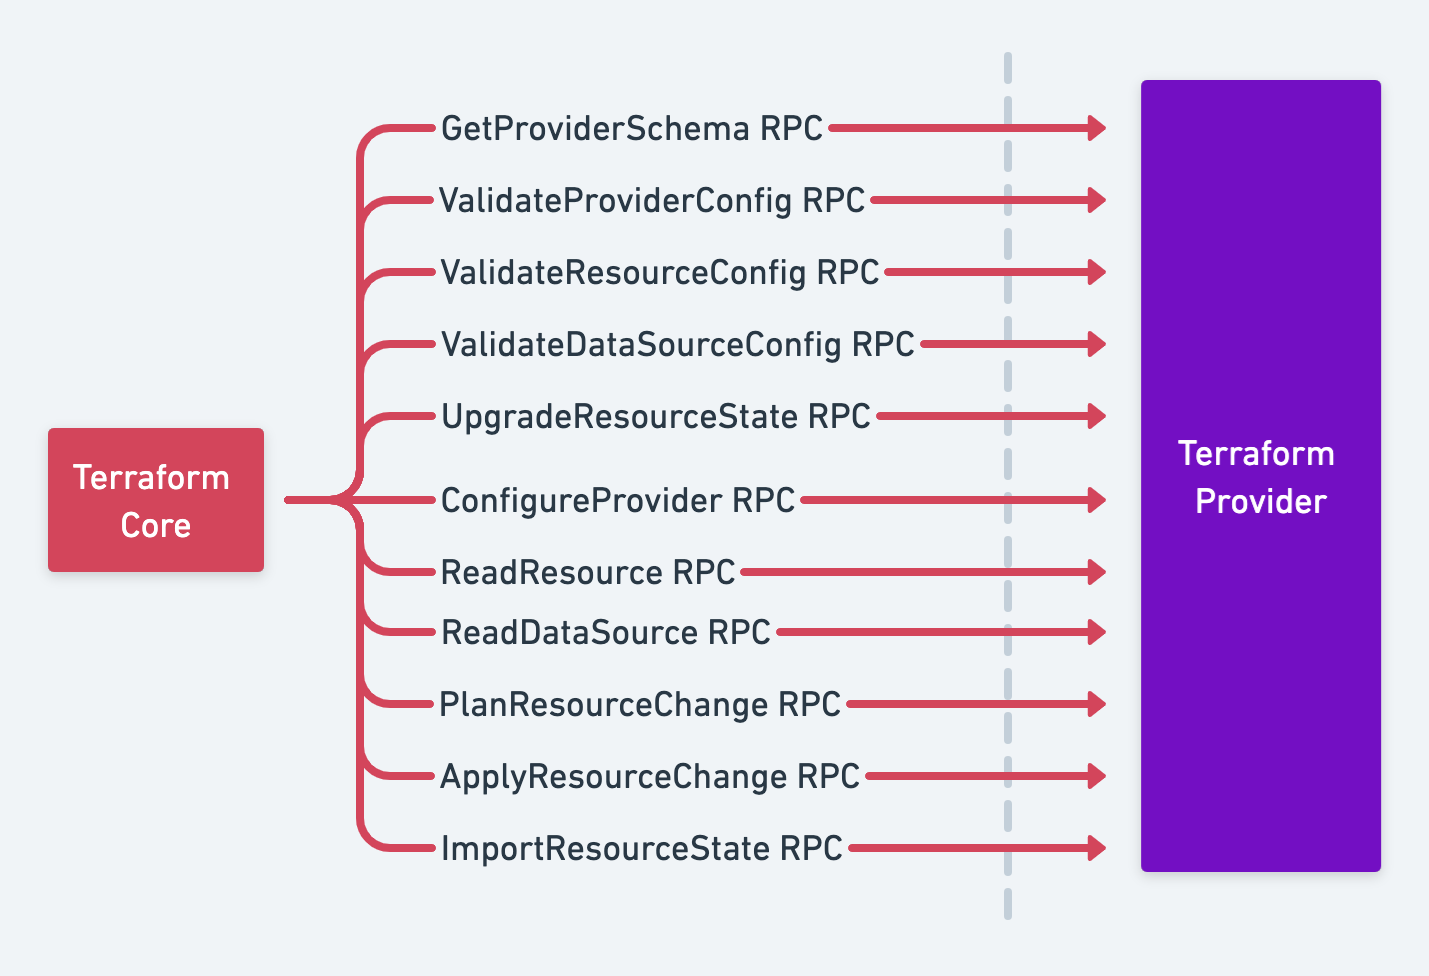
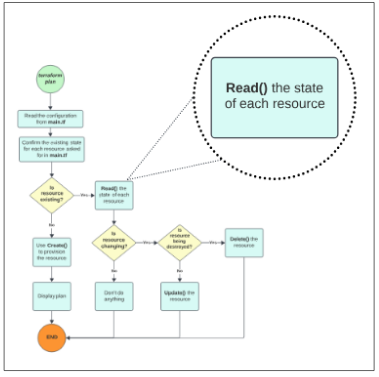
Terraform resources implement what is called a Resource Schema Interface (RSI). Think of the RSI as a checklist of things that each Terraform resource MUST do if it is to be provisioned through it.
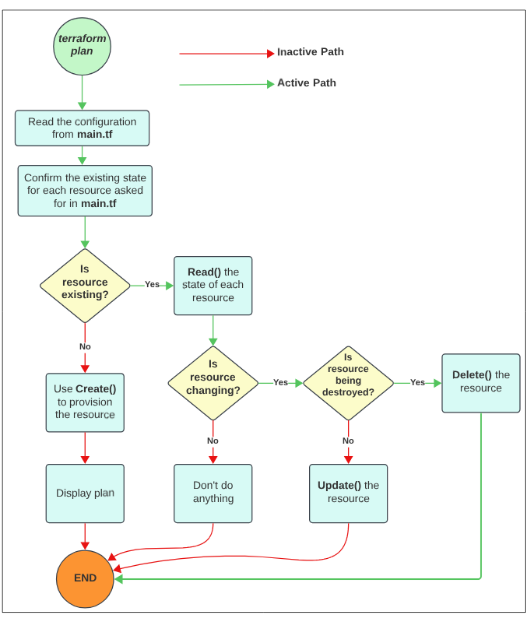
The RSI above maps out the list of events/checks/requirements that each Terraform resource should be wary of. Failure to complete any of these could result in an error.
The RSI requires Terraform resources to define hooks for CRUD functions (one each for Create, Read, Update, and Delete).
Depending upon conditions, Terraform will call these hooks to achieve the following outcomes:
- Create is called during resource creation
- Read during plan generation
- Update during resource updates
- Delete during deletes
Demo: Resource Lifecycle
For this demo, we will use a local resource provider (as opposed to using AWS, Azure, or GCP like is typically done).
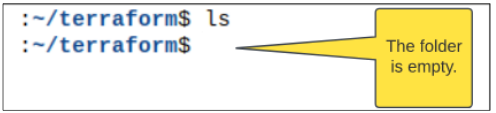
Before we proceed, let's make sure that the folder we are working in empty.
Step 1: Create Terraform main.tf file

provider "local" {}
Step 2: Initialize your Terraform workspace.
Terraform is not aware it has anything to configure/provision ... yet.
We have to use
terraform init
to initialize the workspace (= folder in which Terraform files are kept) and also let Terraform Engine something is expected of it.
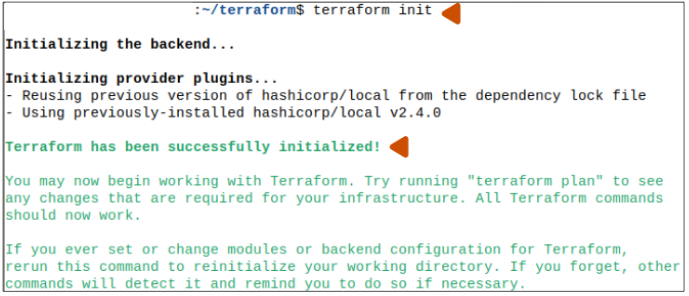
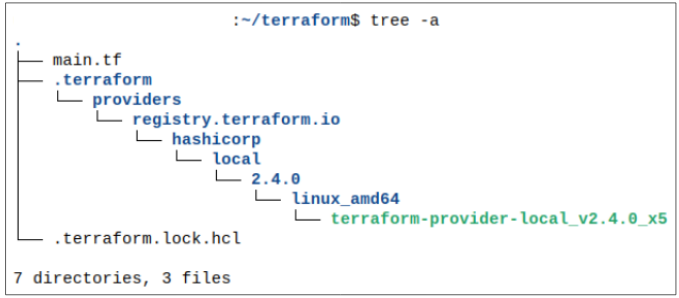
terraform init creates a set of folders inside the workspace.
Step 3: Generate Terraform's plan for provisioning the resource.
The next stage is
terraform plan
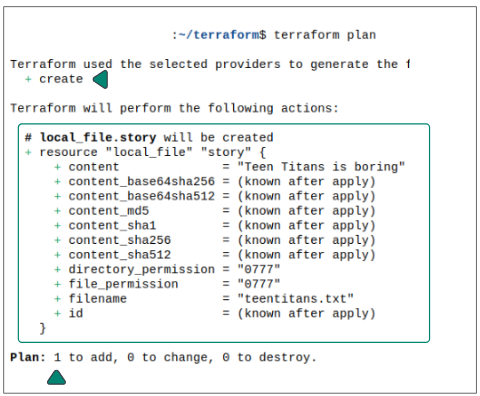
Terraform will list all the resources, along with details for it, as an output from the planning step.
Question: But what happens behind the scene as Terraform plans its execution?
Answer: A lot. Terraform will check the resources being asked for and the provider to use in creating them. It, then, goes through either a Create(), an Update() or a Delete().
Additionally, we can save the output of terraform plan to a json file if needed.
Terraform has a feature that can output the steps planned into a json file.
terraform plan -out plan.out
terraform show -json plan.out > plan.json
cat plan.json
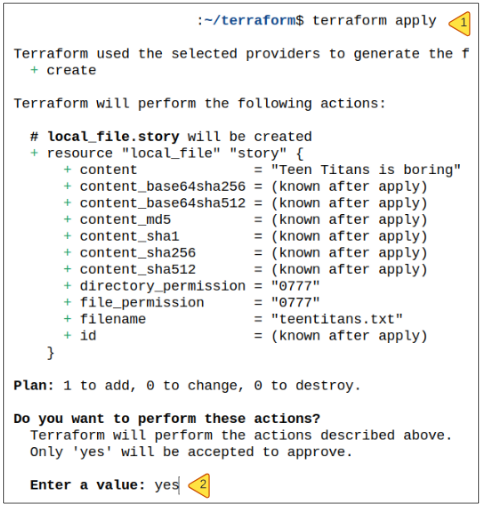
Step 4: Use terraform apply to put the plan into action.
Step 5: Check the outputs of terraform plan in the folder.

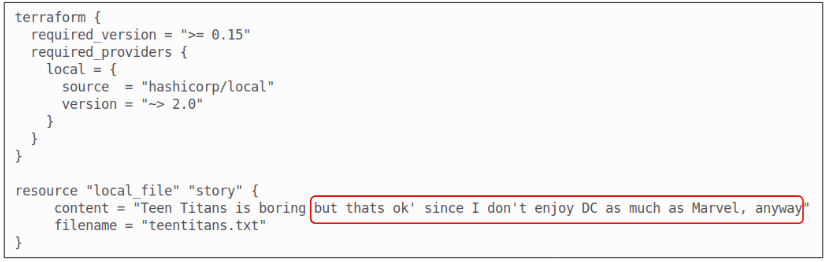
Let's confirm the contents of teentitans.txt first.

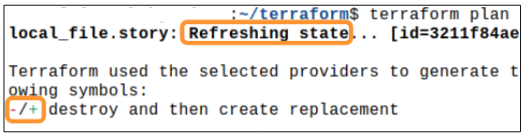
But what is this terraform.tfstate file?
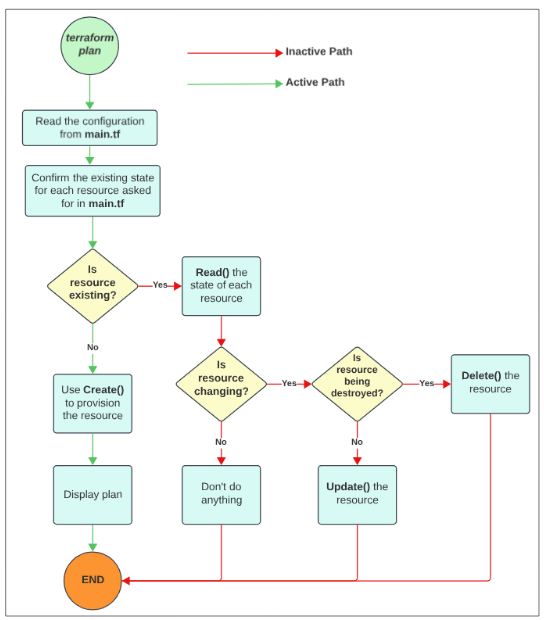
Its an extremely important file and documents the state of various resources that have been provisioned. As shown in Figure 6, Terraform will take a peek inside the terraform.tfstate to check which resources exist.
We should take a look inside the terraform.tfstate file:

So what really happens behind the scene when terraform apply is invoked?
Simple answer is, of course, it will create a text file named teentitan.txt but this is covering over the real magic.
Terraform will call the Create () hook and then using the local_file provider, complete the creation and saving of teentitan.txt.
Step 6: Update the resource.
To demonstrate Terrform's behavior when we update existing resources, we can edit the main.tf file and add a line or two of additional text to it. This additional text will be added to the content of the file.
Terraform will go through the state check as it did when the file was created for the first time, but from that point on, the sequence changes completely.
To kickstart the updating flow, use
terraform plan
and the resulting output shows what Terraform thinks you want to achieve.
To complete the process, use
terraform apply -auto-approve
Finally, we can check the contents of the teentitan.txt file using
cat teentitan.txt
Step 6: Delete resource.
The text file has outlived its usefulness. Our dislike for Teen Titans has resulted in the show being taken off screen and therefore, we can get rid of the resources we created to help achieve this outcome.
The command to delete the resource is
terraform destroy -auto-approve
Terraform will again consult with the terraform.tfstate file, get information about the resource(s) we are about to delete and then proceed on with its job.
I write to remember and if in the process, I can help someone learn about Containers, Orchestration (Docker Compose, Kubernetes), GitOps, DevSecOps, VR/AR, Architecture, and Data Management, that is just icing on the cake.