Deploying a Simple Terraform Configuration.
Scenario
A legacy system has a front end, a back end and an associated DNS. The company is moving to AWS and wants to move their tiered application to the cloud. As the engineer on the team, you can log into the AWS console and set the architecture for the cloud deployment manually OR you could go down the path of Infrastructure Provisioning Automation using Terraform.
You have wisely selected the automated approach.
Table of Contents
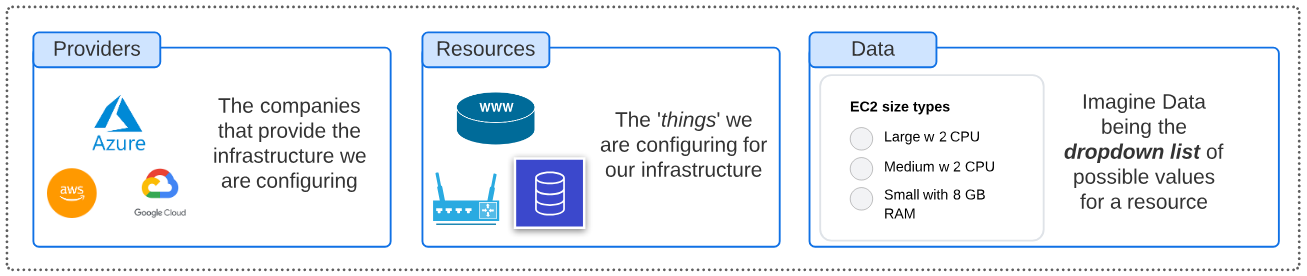
Quick Reminder: Terraform Object Types
Terraform has 3 main object types (or sections in a .tf file) that are needed to complete any Terraform driven IaC task.
Application Architecture
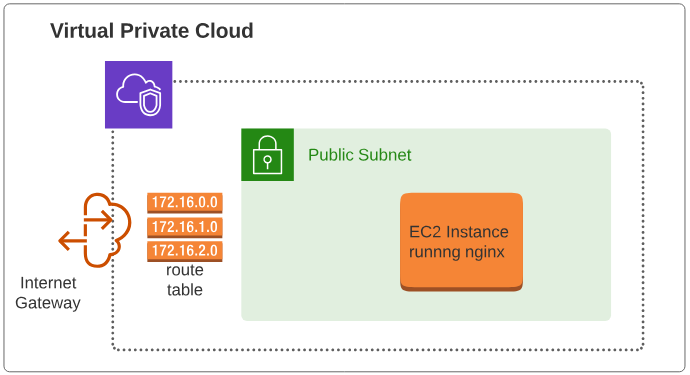
We are attempting to create the following resources:
- VPC
- Route Table
- Internet Gateway
- Public Subnet
- An EC2 instance for nginx
- Security Group
Deploying Terraform Configuration
Step 1: Examine the configuration file.
The main.tf file has the 3 sections (or Object Types) mentioned at the beginning of this article.
Section/Object Type: Provider
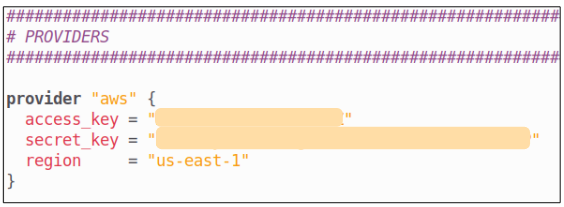
Since we are using AWS as our cloud service provider, the Provider is, not surprisingly, AWS.
- The access_key, secret_key and region can be set by you and this information will be used to authenticate your Identity AND set a default region for your infrastructure to get provisioned in.
- When we run the initialization command for Terraform, the various dependencies and other API resources needed by Terraform to work easily with AWS will be downloaded.
Section/Object Type: Data
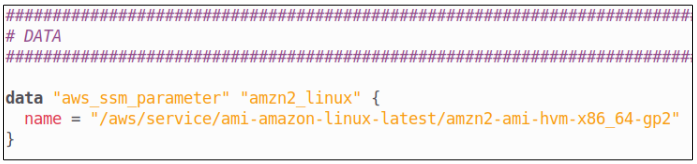
There are many different EC2 instance types (just like there are many different specs for laptops that we buy from a retailer). As engineers, we have to have a sense of what type of compute power we need for work and this is where the DATA object type comes in handy.
- The data object type will look for the AMI that is set as the value for the name attribute.
Section/Object Type: Resources
Finally, the most important section of the configuration file. All the work we do in Terraform, at its core, is geared towards configuring infrastructure items like servers, databases, firewalls etc.
There are 7 resources declared in the configuration file:
| Resource Type | Name |
| aws_vpc | demo_vpc |
| aws_internet_gateway | demo_vpc_igw |
| aws_subnet | public_subnet |
| aws_route_table | demo_vpc_rt |
| aws_route_table_association | app_subnet |
| aws_security_group | nginx_sg |
| aws_instance | demo_ec2_nginx |
Step 2: Execute terraform init.
Let the Terraform magic begin and initialize the runtime environment for its provisioning engine.
$ terraform init

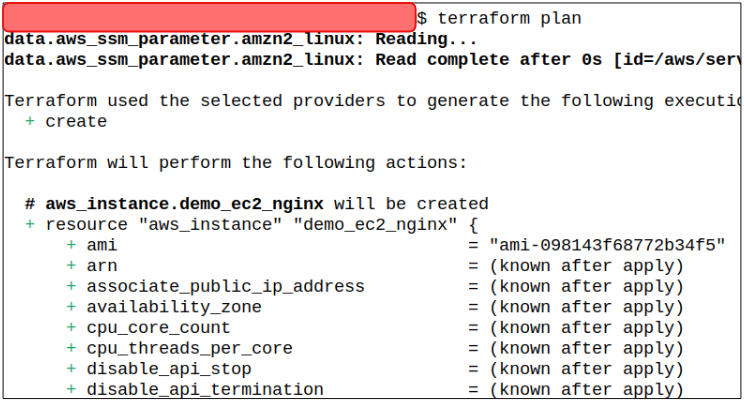
Step 3: Execute terraform plan.
Once initialization is complete, we plan the provisioning.
$ terraform plan
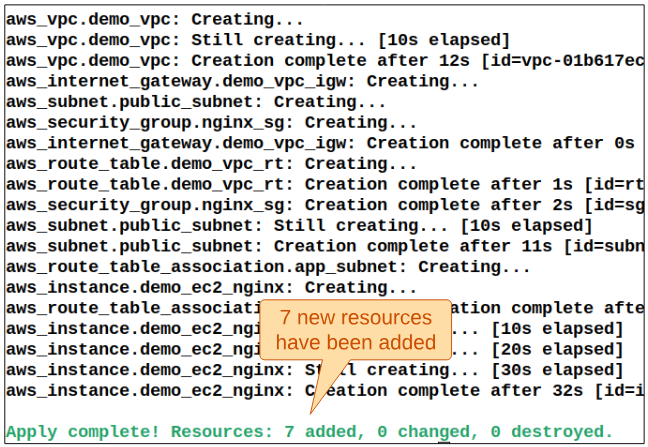
Step 4: Execute terraform apply.
The plan is complete and now its time to see this magic come to its successful logical conclusions.
$ terraform apply
Step 5: Test the deployment using the provisioned EC2's DNS Address.
Find the Public DNS for the newly generated EC2 instance and paste it in a browser address bar.
If the deployment has been completed without errors, you should see the following printed on the screen
You did it. Have a taco
Step 6 (Optional): Use terraform destroy to clean up the resources provisioned.
$ terraform destroy
will clean up the resources we have recently provisioned.
I write to remember and if in the process, I can help someone learn about Containers, Orchestration (Docker Compose, Kubernetes), GitOps, DevSecOps, VR/AR, Architecture, and Data Management, that is just icing on the cake.