Creating and Managing Container Images.
Linux considers everything a file. In fact, the whole OS is a filesystem and has files and folders stored on a local disk. Why is this being told to you? Because, an image is a big tarball containing a layered filesystem.
Layered ? What ? Read on.
Table of Contents.
The Layered Filesystem
A container image is really a template and from these templates, containers are created. Images are composed of many layers, as opposed to just one monolithic block.
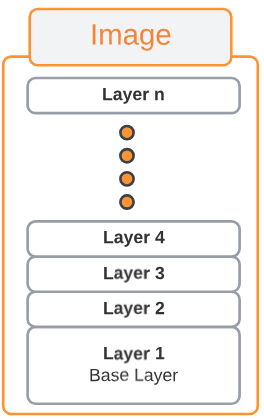
Each layer contains files and folders and only contains the changes made to the layer under neath it. For exampe, assume that we had a very simple image that had 4 layers (layer 1 through 4). Any changes we add to Layer 1 will be saved in Layer 2. At a later date, we might add files and folders to Layer 2 and these additional files and folders will be saved in Layer 3 and so on. The content of each layer is mapped to a special folder on the host system, which is usually a subfolder of /var/lib/docker/.
Docker uses a Union filesystem to create a virtual filesystem out of the set of layers and handles the details regarding the way these layers interact with each other.
An example of a layered filesystem
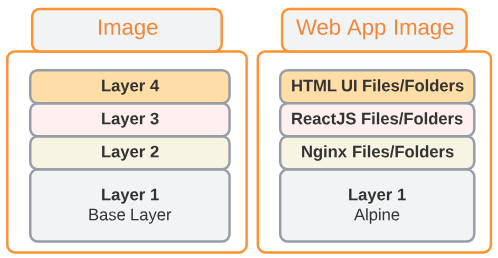
In Figure 2 above, the creator of the Web App Image used the Alpine Linux distribution as the base to which they added Ngixn files/folders but the additional files/folders were saved in Layer 2. Similarily, ReactJS files/folders were added to the contents of Layer 2 but they added files/folders were added as Layer 3 and so on.
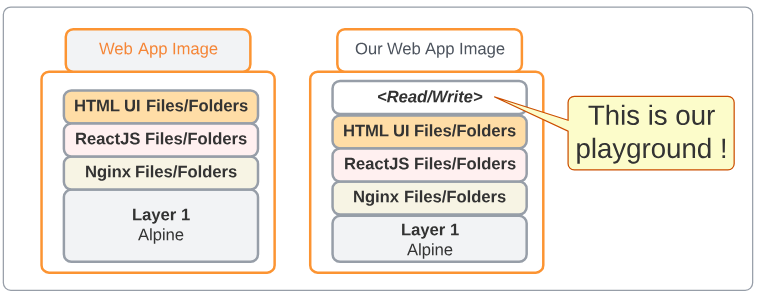
So what would happen if I wanted to add additional functionality to the Web App Image file shown in Figure 2?
As soon as we download an image and attempt to add additional files to it, the containe runtime adds a new read/write layer ON TOP of the existing set of layers. We write our additions to this new read/write layer and voila, we have our own unique image but based on the unique images made by someone else. Talk about standing on the shoulders of giants !
Creating Docker Images
Interactive Image Creation
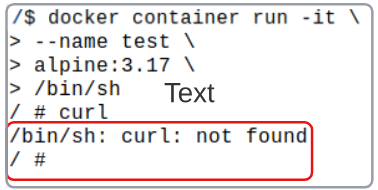
Step 1: Download an alpine:3.17 image
We can create a custom image by interactively building a container. We start with a base image that we want to use as a template and run a container of it interactively.
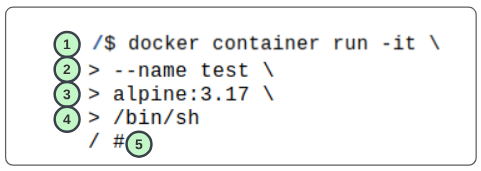
- 1: Docker will run a container in interactive mode
- 2: The container will be labelled test
- 3: The image is of alpine:3.17
- 4: Due to the -it in (1), the container will open a shell
By default, the Alpine container does not have the curl tool installed and we will take on the responsibility of making an image that will remove this great deficiency in our world.
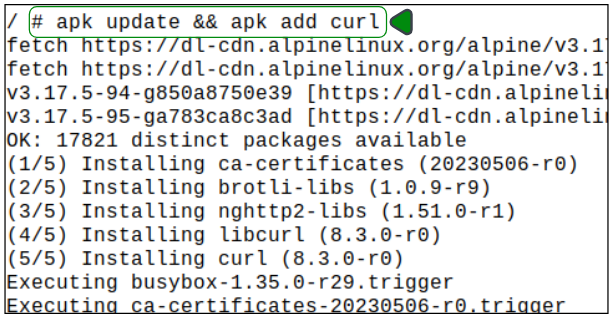
Step 2: Add the 'curl' module to the container.
Step 3: Test 'curl' is working.
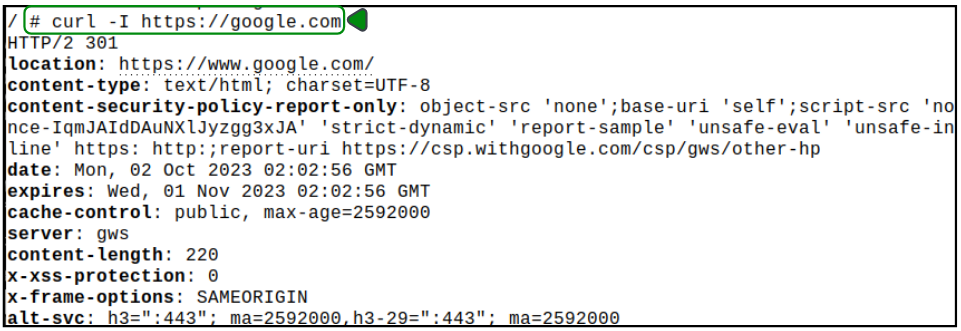
At this point, type exit at the terminal and this will take you out of the container and back to the host terminal.
If we were to look for running containers, we can type
$ docker container ps -a
This command will list all the containers, active or not.

We can also list all the images we have on our system right now.
$ docker images

So where is the outcome of all the work we just did?
Its still here. We just have to close the loop on it.
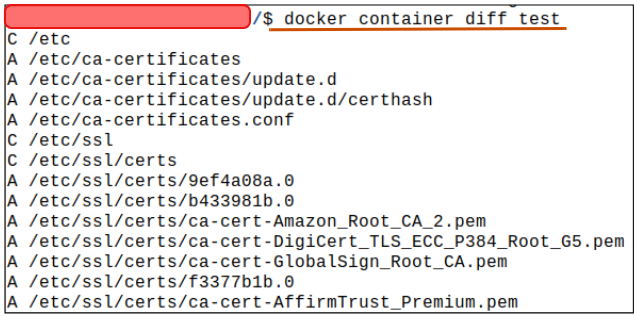
Step 4: Confirm the changes made in our container.
We can use the following command to list the changes introduced to the downloaded alpine image.
$ docker container diff test
Step 5: Commit the changes introduced to test.
The docker container commit command persists our additions and create a new image from them.
$ docker container commit test alpine-w-curl
This command is asking Docker to commit the test container we've been working on and name it alpine-w-curl.

Step 6: Check the list of docker images once commit has been done.
$ docker images

We can also see the history of all the changes.
$ docker image history alpine-w-curl

Using Dockerfile (a declarative approach)
A Dockerfile is a text file and contains instructions on how to build a custom container image.
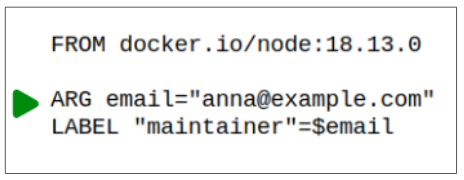
An example of a simple Dockerfile is provided below.
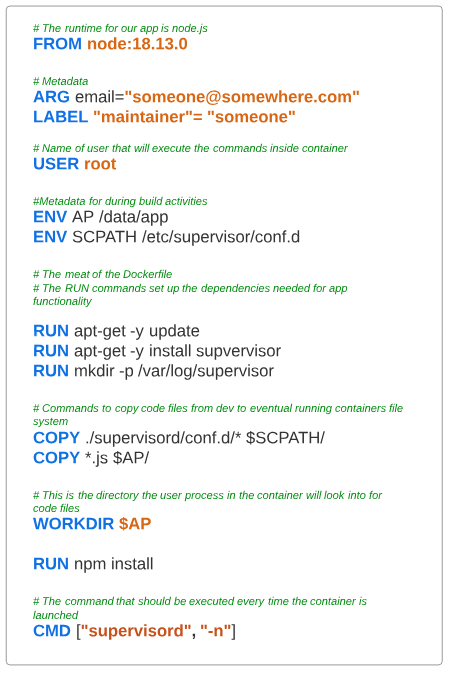
What is the meaning behind each line in Figure 1, you ask?
- FROM: each Docker file starts with this directive. The name of the software and its version, right after FROM, is used to set the base image we want to use for our own custom image. In the case of this example, we know the application is based on Node.js and therefore we MUST tell our Dockerfile that it has to download and include some Node.js runtime image.
- ARG: sets the value for some build-specific parameters. In this demo, the email address of the maintainer is being set for communication in the future.
- LABEL: Labels are a great utility in Dockerfiles. They are simply metadata 'tags' that we can slap onto a Docker image. Labels can be used to search for Docker images.
- USER: The permission levels that the eventual executing process inside the container will have.
- ENV: These are used to set build-time variables. In this example, we are telling the Dockerfile that a folder called AP is located at /data/app and one called SCPATH is at /etc/supervisor/conf.d.
Let's put more meat on our 'conceptual' bones and make a Dockerfile.
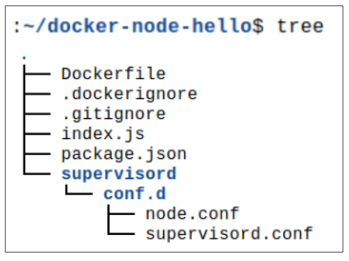
Step 1: Download the repo.

Step 2: Investigate the files downloaded from the repo into docker-node-hello.
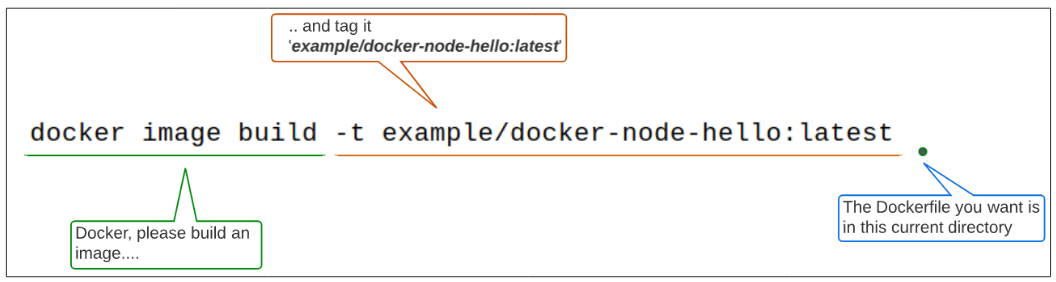
Step 3: Build the image.
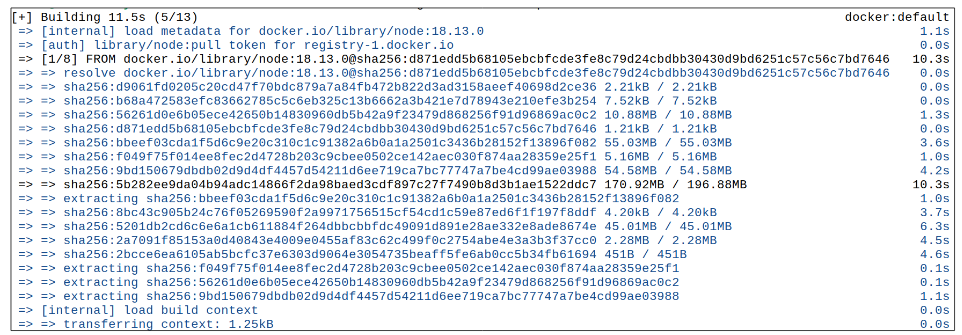
Step 4: Confirm the image was built.

Step 5: Test the image.

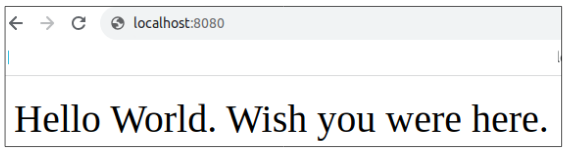
Since we are mapping a port on the OS to a port inside the container, we should be able to type localhost:8080 into the browser and the contents of the simple Node.js application running inside the container will be shown.
Passing build time arguments
In Figure 14, we were introduced to metadata capabilities in a Dockerfile. In particular, we saw ARG, LABEL and ENV as example of special keywords that can be (should be) used for providing additional metadata for our container.
Before we work on passing values for the build process, let's quickly confirm how the ARG and ENV keywords are typically used.
Inside the Dockerfile for our example, there is an ARG and an ENV keyword.
Assuming the DockerFile does have a Label containing the maintainer's email address, we can find this bit of metadata pretty quickly and easily by using simple Linux grep commands.

But what should we do if Anna is on vacation and Noah is temporarily given the task of being a maintainer?
Noah has to create a new container from the same Dockerfile but doesn't have time to update the email address inside. Does he have to stop the build, update the Dockerfile and then continue his work?
Not necessarily (though it would be advisable to keep the Dockerfile current). Noah can simply pass a new email address through the command line when he is running the docker build command. The value(s) for an ARG/s passed from the command line, using the --build-arg switch, will supercede any values already documented inside the Dockerfile.

We can confirm that even though he did not update the Dockerfile directly, his email address will be displayed when someone wants to look for the maintainer.

Passing ENV variables to docker build
Environment variables are a named value that can affect the way running processes will behave on a computer. They are part of the environment in which a process runs. For our demo, the environment in which our Node.js application will run is the OS.
In our example, there are 2 environment variables being used.
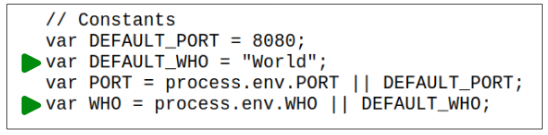
Figure 8 shows the message displayed in a browser when we were NOT OVERRIDING the value of DEFAULT_WHO.
Just like with ARG, we can use the -e switch to set the value for an environment variable and include it in the build process as shown.
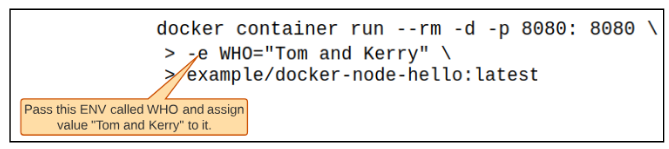
Accessing the containers content through the browser shows that the default value for WHO ("World") has been replaced by "Tom and Kerry".

I write to remember and if in the process, I can help someone learn about Containers, Orchestration (Docker Compose, Kubernetes), GitOps, DevSecOps, VR/AR, Architecture, and Data Management, that is just icing on the cake.